|
The Annexmaster is SURE that there are other
references on the website to batteries, but
May, 2009. Bill, car 313 suggests:
(useful regardless of battery location) * * * Replicars (1976 onward) had
the battery under the car toward the rear. This, on the Phaetons, anyhow
A battery cut off under the driver's seat, makes it easy to disconnect the battery to work on the car. Someone had run extension
terminals up into the back seat area so you could hook to them I had suggested once that a
little boat door (hinged hatch from a boat supply place) might If anyone sees those
references on the website, please email me
GlassicAnnex@aol.com
Tail light lenses (on my 1973 -- VIN 689) In 2013 I was poking around the back of my car since my one turn signal had stopped working for the second time. I removed the taillight cover - 4 1/4" red lens, three holes for screw mountings. The lens was marked GROTE 472 in the plastic as well as SAE - STIP 70. It turned out that the bulb was ok, but there was a bad connection - old, dirty, corroded bulb? -- the last time I sanded the various contact surfaces, this time I put on some dielectric grease -- a little tube of stuff from the car parts store to improve connections on electric stuff. At the time I put back the lens, I noticed that one of the three mounting holes was "stripped out" - the entire hole was the size of the recessed part and the smaller lip was gone - meaning a screw would go all the way in and not really hold the lens. PARTS SOURCE Using the term GROTE 472, (also called GROTELITE) I found a couple of these on eBAY at $18 a pair but also found ones that LOOK the same under FORD TRUCK LENS 1957 to 1960. I am not sure they match exactly, but they were also 2 for $18 and may be found at other truck parts places. Be cautious, however, since I also saw two hole lenses for that era truck.
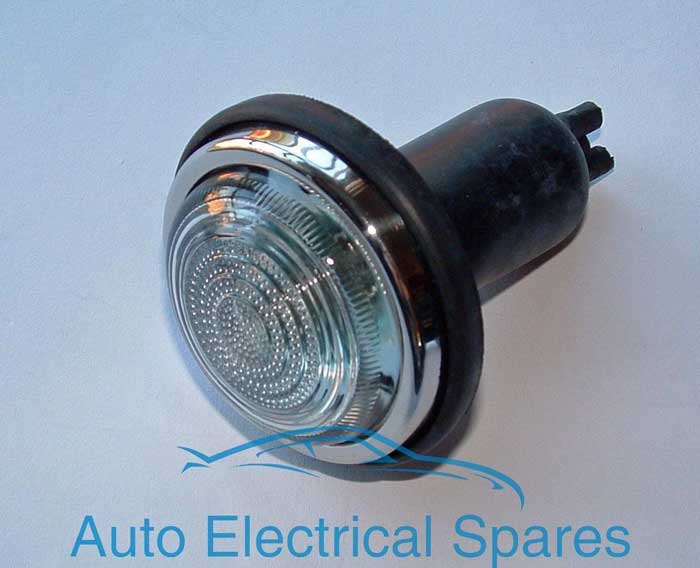
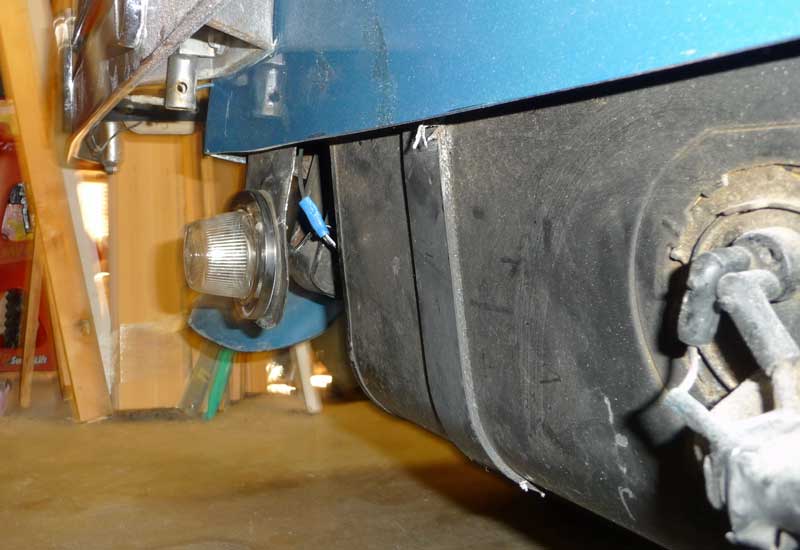
BACKUP LIGHTS (on my 1973 -- VIN 689) My car came with backup lights. In checking the pictures, it looks like some other 1973 era cars also have backup lights and many others do not seem to, so I am not sure whether this was a limited use, like to comply with some state regulations, or whether all of these cars had them during a period. In any event, one of the lenses was missing when I bought my car. I happened to be at an old flea market type store that had lots of camper and auto supplies and accessories (new, but old merchandise) and I saw lights that looked similar, so I bought a pair, just in case ($5.00 each). The lights were an exact match for my Glassic lights, so here are the markings from the original and the new lenses. OLD: on the now pitted metal ring holding the lens: PM392 and on the lens itself: STRATOLITE #105 SAE - R121-72 D.O.T NEW from the supply store: no marking on the metal, and the lens said: SD 0357
By the way, the backup lights have not worked on the car since I got it, and the old bulbs tested ok - so that is another project.
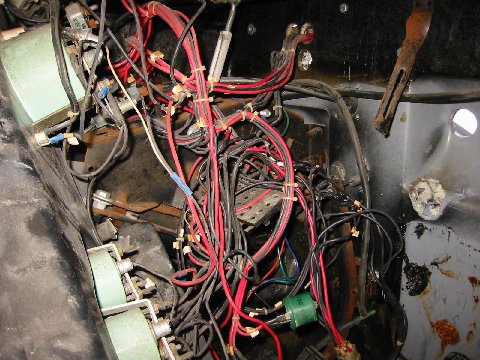
Behind the dashboard -- All red wires! The majority of the wires, at least in the Replicars (1976-81) are mostly all red and black. This makes life difficult for the restorer, so caution is needed. The reason for not having color coded wiring is explained by the owner here, but, in addition, think about the following observation by your favorite Annexmaster:
These pictures of behind the dash of car 1290 should serve as a warning to proceed slowly and carefully and mark any wires you remove behind your dash.
|
|
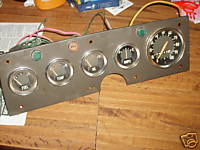
Scout instrument panel is the source for gauges
In July, 2008, while restoring her car after a fire, Stacey, car 341 reported: Scout dashes, maybe I should've said "gauge cluster" in late 60's and 70's Scouts -- the gauges are the same but in a different arrangement. the turn signal blinker indicators are also Scout. The ones in the picture are the actual ones going into my car. I paid $50 for the whole thing! |
No crank (sometimes) on a 1973 Probably the worst problem one can have with any car is an intermittent problem. My Glassic, # 689, worked fine when I got it, then, one day, I turned the key to start it and -- nothing. The car didn't crank or give any sign that there was a battery in the car. Actually, the gauges moved in the ON position, but START yielded dead silence. I put the car in and out of park, and then the car started and ran ok. Several starts later, it did the same thing. Once after getting gas at a gas station, a mechanic eventually got the car started. Once at a car repair shop when trying to move the car into a bay for an oil change. That time I got a new heavy duty starter installed and the car ran fine -- for a while. Later, when taking the car in for transmission work, same issue. At that time I was told that the starter was bad, (a few hundred miles after the first new starter) -- so I got another one. New coil, new points, new spark plug wires, new solenoid. Among the surprises was one time when the car did not turn off, even with the key turned to off. Then, a few starts after the new solendoid was replaced, the car started, but as soon as I went back to the run position and the starter quit cranking, the engine stopped dead. Then, once, it finally kept running, but struggled. So, among checking Google message boards and videos on troubleshooting, I discovered that The solenoid ground did not seem connected. I used a test light, positive on the battery and negative on the wire connector that was bolted to the base of the solenoid -- no light. PROBLEM SOLVED -- (or is it?) It turned out that by fiddling with the wires between the driver's side and the passenger side and the coil, I could make the grounded test light come on and off. I then tested the coil wire to the ground (as described in troubleshooting the starting system in my Haynes manual) Again, I could get the test light to flicker when fiddling with the wire clusters. As my dear wife watch the test light, I diddled the various wires. Several places seemed to cause the intermittent power break. FINALLY, I realized that by touching ANY part of the wiring, I was shaking the whole cluster of wires. I removed the air cleaner, clamped two scraps of wood and gripped the wire cluster as it went from drivers to passenger side. that held it firmly in place. At that time, jiggling either side of that clamp did NOT make the test light go on or off. As it turned out, the issue was right where I had put the clamp! There are two wires that run side by side (all of this covered with black electric tape) There was a connector bridging the two wires and basically connecting them to each other. When I got that connector uncovered, I found out that it was failing, some of the time. My guess is (and it is only a guess at this point) these wires are, one for when the key is in the start mode, and the other is for when the key is in run. When the two wires were not bridged as they should have been, the start wire did not get power to the starter - dead. Other times the start wire was ok, but the bridge to the run wire was broken - no power to the coil in run. I put two snap-on wire clamps on the car - one in front of the original clamp, and one on the other side, or behind the original. That way, if the bridge was broken, or either wire was damaged, one or the other or both clamps would fix it. I covered the spot where the old clamp had been with electric tape, since bare wire was exposed - neither wire seemed broken. Jiggling all of the wires after that repair yielded no issues.
These wire clamps are available in car stores (I assume, since I had some in my electric bins) and work like some patio light connectors where you put the wire in a trough and pinch down a pointy metal piece that pierces each wire to touch bare metal. To clarify, If two capital letter I's are the two parallel wires, then the clamps make them look like a capital H by bridging the two wires. I learned that during the START position, power goes to the starter solenoid, and FULL 12 volt power goes to the coil to give the spark plugs extra punch to fire up the car. Then, in the RUN position, the starter solenoid is no longer needed, of course, and turns off, then power goes through the CONDENSER, on the firewall and then to the coil, supplying less power to the coil so that the points in the distributor don't burn out prematurely. Using Google, and my Haynes Maverick manual (Any Ford 302 should have the same info) I found the following search words helpful. Troubleshooting starting system, electric diagram Ford solenoid, No crank. I had a cheap electric multi-meter, and an auto test light as well as a jumper cable made from car wire and a couple of alligator clips. In my case, the troubleshooting guide began by telling me how to test the switch that works the starter. It let me confirm that when the car would not start, power WAS leaving the passenger compartment and the switch was working right.
EPILOG: (2013) After repairing the wire issue, above, the car worked fine - - - for a while. Just when I figured it would start EVERY time, it was dead one time. It turned out to be a sticking rod from the key to the starter switch. I can't even see it to take a picture, but here is what it is -- somewhere inside the key lock, when you turn the key, it pushes a long rod down to the base of the firewall, where a switch is located with terminals for start, run, etc. If the key turns but the rod does not move, nothing happens. One time, months ago, I turned the key OFF and the car just kept running - not dieseling, just plain still running. I pulled the coil wire out and later put it back and the car ran fine. I now wonder if the rod also stuck in the ON position that time. This rod runs along the TOP of the steering column. I can feel it by reaching up among all that wiring under the dash and feeling for the rod. I will try to reach a camera up in there to see it, but quarters are tight! I shot a couple of squirts of silicon spray up in there, but I probably should Google the issue for proper lube. I understand it is pretty easy to pop out the lock in the steering column (if you have the key) , so maybe the END of the mechanism can be reached from there to lube it. The last time I had a no crank, I reached up and touched with the key at ON the rod and felt it move. Then it started fine. -- having failed to get a picture in my car, here is a 74 Maverick column from an ad - you can see the rod and switch in the exploded view.
GROUNDING ON A FIBERGLASS CAR. Most cars are metal, and anything touching the body is grounded. Not so with a Glassic, so components that are usually grounded by bolting them to the firewall, for example, need to have an extra wire to lead to ground.
Melted wires cause odd starter behavior In Nov. 2008, a series of events happened with car 1254,- a 1978, around the time of the sale of the car by the Annexmaster. At first attributed to the car's discontent at being sold, the eventual source was less "spiritual". Exactly what caused this is unclear, but hopefully the story can help others. When preparing the car for inspection, (after several un-eventful years of operating the car) I had started the car 2 or 3 times while adjusting the fast idle. On the third attempt to start it, the solenoid just made a repeated clicking sound, although there had been no sign that the battery was other than fully strong. I first replaced the solenoid, since the battery HAD been strong on the first 2 starts. No change. I then attempted to jump the car from my van by connecting jumper cables to the battery. Still only clicking at the solenoid but the alternator light lit up on the van, and even speeding up the van engine did not change the clicking. Upon removing the jumper cables, I saw that they were HOT, not warm, but HOT, as in too hot to hold onto. Clearly not right! I replace the battery, and the car started fine. It appeared (at the time) that there had been a short in the battery. The next day, after a normal start and test drive by the buyer, the car did not turn off when the ignition was turned off. It did not want to leave! A quick attempt to engage the started while the car was running seemed to free the solenoid and the car turned off ok. John bought the car, started it up, put it on a trailer, turned it off -- all seemed fine. Several days later, electrical issues began for the new owner.
The next contact from John was by phone - I think. At least I do not see an email. As I recall, he went on a cruise and had more issues.
The lesson here is unclear. Over the years I have heard of wiring issues, and a number of people have gutted and re-wired their cars completely. In this case, was it ALWAYS the wire, and not the battery or solenoid? Did the repeated starts (only 3 as I recall) make the short happen? Did the jump start attempt further aggravate an existing short? Did the short make the battery cables hot, or was there a short in the battery that heated ALL the wiring when jumping the car? If it was a wiring short, why didn't a fuse blow? Did a battery short start the sequence? Was it just old age of the wires that made the short, or the fact that they lay on the hot engine block? As our cars get older and
older, you can't tell where a problem will lead you. A few days later, John wrote:
|