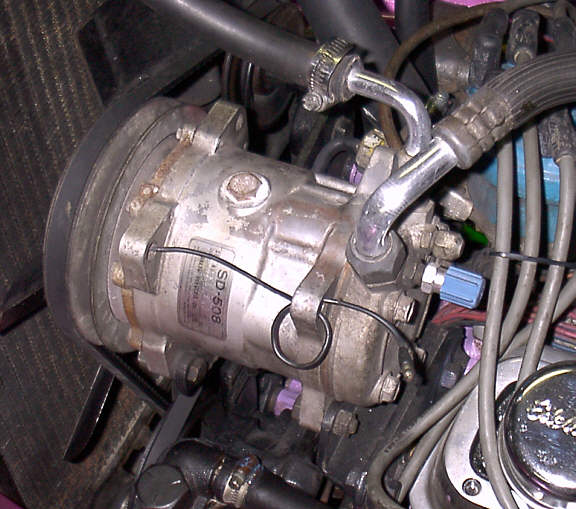
| 3/12/04 Here is the saga of my air conditioning update. My 1978 Phaeton had not had working air conditioning for several years. The previous owner's "story" was that the AC was working but when the rebuild engine was installed, it was just not hooked up again. He connected the electric wire to the compressor and showed me how the compressor clutch came on and off on demand. When I finally built my hard top and windows, I was ready to get the AC working. Well, it was quickly obvious that the car needed a new drier (located under the front bumper). A pressure test showed that it also had a leak at the front seal of the compressor. A local AC shop said they would replace the seal for $90 - but the mechanic said that he really didn't want to do the work, and that most people just buy a new compressor. The compressor in my car was a Sanden SD 508, which fortunately is a fairly common item that is still made today. They are called "Sanden" for Sanden/Sankyo or some such. They are a also popular in the hot rod business. They can be found in local auto shops for around $200 -- but I was able to find a chrome plated new one for $250. Because I inquired about it at a show, I was told that postage would be paid by the vendor. That did not happen, however. There are a few options for the SD 508, whether they are set up for Freon or the R134A refrigerant - also whether they have a double pulley, like mine, or a serpentine belt pulley. The compressors also come in a "polished" finish, priced between plain and chrome. My vendor, listed below, also sent me a chrome plated drier, at a cost of $65 -- plus postage. The drier had a bracket with it, which was backwards for my use, but the bracket was held with a hex head set screw, so I just spun it around. |
| The issue of whether to convert to 134A refrigerant
came up, and I decided to take my chances with the less
costly, more environmentally friendly newer system.
Discussion of this topic appears here. When installing the new compressor, the issue of fittings for the service ports came up. The old fittings can be converted with adaptors, but my new compressor did not have any fill ports at all ON the compressor. So my mechanic was going to splice them into my hoses. I tried to find 90 fittings for the compressor with the service ports right in the 90 degree tubing. This proved not so easy to accomplish. |
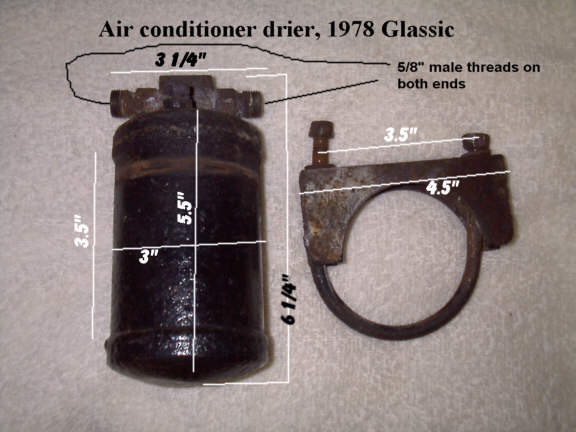
| Not only was my drier all rusty, but the brackets
holding it were also nasty. I made new ones from some 1/4
inch aluminum bar material that I had. It buffed up
fairly nicely. The old
drier can be seen toward the top of this picture. (I
slapped some paint on the rusty soup-can sized drier) but
you can still see the rusty bracket and clamp. This
picture is looking up from underneath the car. Another view of
the old drier with measurements, for use in finding a
replacement.
A/C fittings - not sure why I had this, but found the picture.
NOTE - the pics on this page were added in 2014. It
appears that the page acchange2.htm was
completed |


