|
In Nov. 2006 a question came in about sources for car covers. Someone wanted to get a gift cover for an owner who was uisng a TARP to cover their car. Mostly with the help of Louis, a long-time Glassic friend, I learned the following info.
Annexmaster: Louis followed up with his receipts for two tops. One for his Glassic Phaeton and one for his Shay Roadster. In 2003 -04 he paid $199 for each cover, and $ 5.00 for a bag for one of them. Shipping was $12.99 for each one. He sent me several pages from a catalog, showing a variety of prices for different qualities. A phone call to the vendor may help you decide which one is best for your situation. 1-800-423-5525 Apparently, you can get them to fit side AND/OR rear mounted spares. Annexmaster's observations: 1931 Deluxe Phaeton, or 1931 Roadster are the closest matches, but I wonder if a general purpose cover for a SEDAN or COUPE might also fit. I saw Model A covers in several Model A parts catalogs (see LINKS) and the one picture I saw had a cover that seemed loose enough to handle side mounts, etc. Perhaps someone will share their ACTUAL experiences. RADIATOR SHELL INSERT SOLUTION In Sept., 2006 Clint, owner of car 562 found this solution:
-- photo of the modification appears here.
December, 2012. the owner of car 1500 reported:
Dimmer switch foot rest accessory (Called "Accelerator Foot Rest") Sept. 2006 -- The Annexmaster says: I may have posted this somewhere on the site before, but when someone spoke of the crowded foot space in a Glassic, I remembered this item that is on my car and works great. It is a foot rest that goes near your dimmer switch. They can be found in Model A parts catalogs, and bolt on a base through the floorboard. You rest your foot on IT, not your dimmer switch. When you want to hit the dimmer, you slide your foot over and off the pad. They appear to be originally on Model A's as a rest near the accelerator. Bratton's 2006 Antique Auto Parts catalog pg. 68 shows them at $3.95 plus a base plate with 3 holes for screws / bolts for $2.50 more -- plus postage. My placement of this footrest was arbitrary, it might well go directly above the dimmer switch, so it is more centered under the ball of your foot. Where mine is works fine, too.
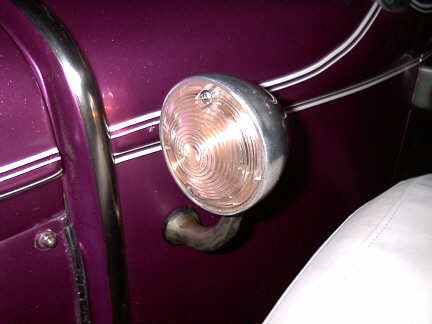
Cowl light lenses Dave (car 1279) found that 1957 Chevy parking lights, or turn signal lights, were a pretty good fit for his 1978 Glassic cowl lights. I got some for my car #1254, and they fit great, although the holes don't line up exactly. The Chevy lens holes look to be designed to be a bit off center, so I ground down the length of the bolts that came with the lenses and used only the top one. They look good. Those parking lights are available as reproductions in both orange and clear.
Headlights cut off and on again -- photos below -- headlight switch Nov., 2005 - (car 1254, a 1978) I turned on my headlights and after a few seconds the lights went out --There was a "tink" sound from within the dashboard. A few seconds later, the lights came back on and soon cut off again. When I turned on only the cowl lights, same problem. Not being a mechanic, I took the switch loose by pulling off the knob and unscrewing the bezel (chrome housing) on the dash. I had taken the dashboard loose, but you MAY be able to do this without loosening the dash. from below the dash, I pulled the unit down so I could reach the wires. At first, I thought that the problem was a bad switch, but, after labeling the wires connected to the switch (to put them in the same place on a new switch) I started pulling them off, one at a time. The second one from the front of the switch on the left side operated the cowl lights. When it was removed, the headlights worked, but cowl lights did not -- and they did not cut off. I marked and cut the wires to each cowl light in turn but the problem continued when I connected that wire to the switch. THAT'S when I realized that the tail lights also came on with the cowl lights. It turned out that one of the taillight lamp holders was sticking out and hitting the arm that held the taillight fixture on. (this car has Model A lights installed) That was shorting out. The pictures below show the switch (I would look at '70s Bronco switches first) and also the separate device, which I guess is an overload protector. It is like a circuit breaker, only it re-sets itself .
Above, the white circle is the overload protector device mounted on the speedometer housing. On the bottom of the headlight switch, the black circle (# 2) is a spring loaded button that can be pushed in. Louis (car 1121) says that pushing this button in allows you to pull out the shaft and headlight knob. In my case, the knob came off when I pulled hard, so I did not need to remove the skinny shaft. I was unable to get that shaft to slide out even when holding in the button. I replace my knob with one with a set screw since it kept pulling off when I turned on the lights. Two people have said that Ford headlight switches were notoriously bad back then.
Here is my headlight switch pulled down below the dash. I put on the bracket that goes behind the dash to hold it back, and the chrome bezel that goes through the dash. The threaded bezel screws into the large hole near the white notched dashboard dimmer wheel. Summary: If your headlights cut off and then on with that "tink" sound, before struggling with the switch, first try checking for obvious shorts. If that happens with only the cowl lights on, check them and the taillights. If it doesn't happen with the cowl lights on but does with the headlights, the problem is likely the headlight wiring.
Fuel sending unit -- also motor mounts Received 10/2005 from Ron, car #221, a 1967:
Received 2/15/06 - regarding Dave's car # 1279, a 1978
Lowering the front of a 1973 from the owner of car # 800 - info received 4/11/05
Hood latches -- Here is a tip: Model A parts suppliers have sets of little rubber-like tips to go on the hood latches to keep them from scratching the paint. A kit has a small cap for the end that hooks on, and a bigger one for the end that you pull on. The tips that can be bought for those do-it-yourself wire metal shelves (available in Home Depot etc.) look like the same thing. I got some dark brown ones in a box of yard sale stuff, and they fit fine -- they also are likely cheaper and easier to get than "Model A" parts..
Paint -- including restoring the finish, painting, stain or staining vinyl Received from Louis (Car #1121) April, 2004 -- I sprayed the trunk black last night using Dupli-color vinyl paint from Advance Auto and ordered new hardware from Snyders. The paint came out good. I first sprayed it with gloss black and I didn't like it . I let it dry good and resprayed it flat black. I like that much better. Oh, by the way , I first bought this new Krylon Fusion paint that the guy recommended and it didn't work. I tested it on a old piece of the same material that the speaker wires used to run through. It would never dry. I called the 1-800 # on the can and the guy said "yeah, that happens sometimes when the paint reacts to the polymers in the paint." He said it never would dry, (boy, I am glad I didn't spray that on the trunk). anyway, don't use Krylon Fusion on anything car related. In 2006 the Annexmaster received some old, weathered, dirty spare tire covers from a fellow owner and bought a spray can of Vinyl stain / colorant at a car parts store. It worked great when using white on the white covers. The dye was like spray paint, only quite liquid-y and thin, but it soaked in and covered well and did not look like paint. After a year or two, the tire line stains that had been on the cover re-emerged some, but all in all it was a great way to freshen up those spare covers. Paint -- At the 2003 reunion, Mark, (Car #1290) suggested that owners use Allgirip 2 - when repainting their cars. Mark works for a boat company, and says that Allgrip2 is specially designed for fiberglass boat use.. 3/06 Clint, car 562 reports on his dull, weathered paint job:
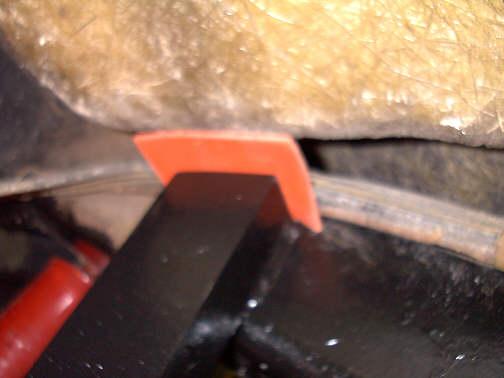
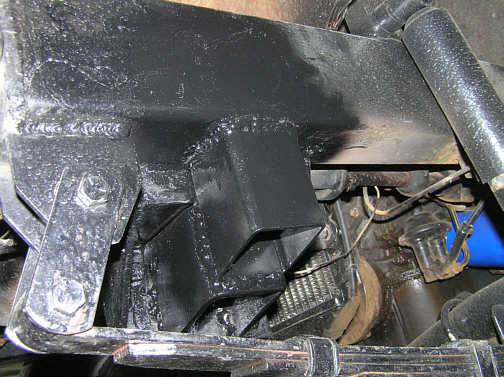
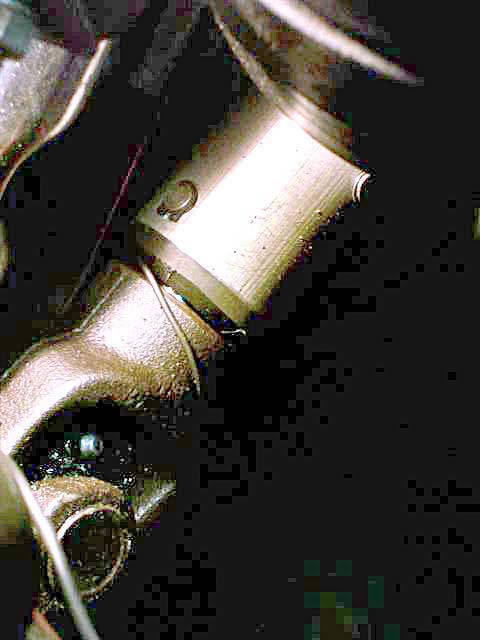
Brake Line placement -- two items: 1978 and 1973 While painting the battery box on my 1978 Phaeton in preparation for putting in a new battery, I noticed that the brake line, some wires and possibly the fuel line were resting directly on top of the u-shaped channel piece that makes an upright to hold the battery platform under the back of the car. I was afraid that there was a possible rubbing spot there so I put a piece of rubber gasket material across the top of the channel and the lines now rest on it. Forgive the second picture, which turned out blurry.
Car 838, a 1973 found the situation below while
doing a frame-off restoration. This car The view above is looking down from where the car
floorboards would be if the
Gas Tank Filler Neck The fuel filler neck (rubber) on my '66
had become
deteriorated to the point that when I filled the tank
fuel
would leak both during the filling and after if I
"topped it
off". I tried to find a bendable fuel hose but the
sharp
angle needed to get from the filler opening to the top of
the tank was to acute. I tried several approaches but the
one that worked best was as follows.
Electrical problem troubleshooting This was found on a Mustang II website in response to a question about a battery draining overnight -- the technique should be valid for ANY car. Sounds to me like a faulty voltage
regulator......
Front End From Joel in 2002, trying to recall info from 30 years ago when he was building Glassics: All the components for front end alignment should all be standard Ford parts - probably for an Econoline E-100, vintage mid to early 70';s -- Tie rod ends should be easily matched up by any competent parts house (TRW or MOOG) with no problem... U joints would be standard Ford, probably Maverick or Fairmont... All the later models (Replicars) - 1976 and up all used the mustang II front end components, but all the tube axles used E-100 components. The bushings were in the spindles and the axle should not get ANY wear unless the set screws that held the king pin were loose allowing the king pin to work in the axle "end"... The bushings in the spindles would only cost a few cents and a "king pin kit" would only be a few dollars... More from Joel in 2004: The FRONT ENDS on Glassics were 3 phases. First were the International based cars, using International front end components. "Phase II" is the special-built chassis w/ leasf springs, MMI tube front axle and Econoline E-100 front brakes, king pins, etc., and a Maverick rear axle (V-8 - 5 lug) and later came the Mustang II (Phase III) chassis with the "molded" front suspension member and Mustang II front suspension, brakes, etc., with the coil spring - trailing arm rear suspension... There may be Mustang axles available w/ 5 lugs (for a V-8 Mustang???) and front 5- lug rotors are available from Speedway, Honest Charley, Summitt and who knows who else to get you up to 5 lugs... My wires (wire wheels) came from Vintique in California and they are all 15"... My problem is that the wheels only have outside offsets, so they stuck out too wide in the rear, so I had to have the rear axle housing and axle shafts narrowed 2" to get the rear tires back up under the fenders... The front was OK (thank goodness) but all the wheels (on Joel's car) are the 7" wide 15"...
Steering sloppy on a 1972
From Clint 3/2006 -- the problem:
His solution:
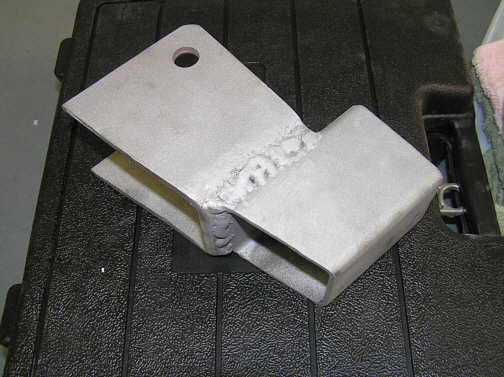
New steering bracket fabricated
Steering bracket welded in place.
Steering vibration damper improves steering for a 1978.
|


