Trunk construnction Part 2
Since the trunk construction
page was getting
so large, I decided to split it.
Although the drawing belongs in
part one logically
I put it here anyhow. Scroll
down for the pictures of
the second half of the project.
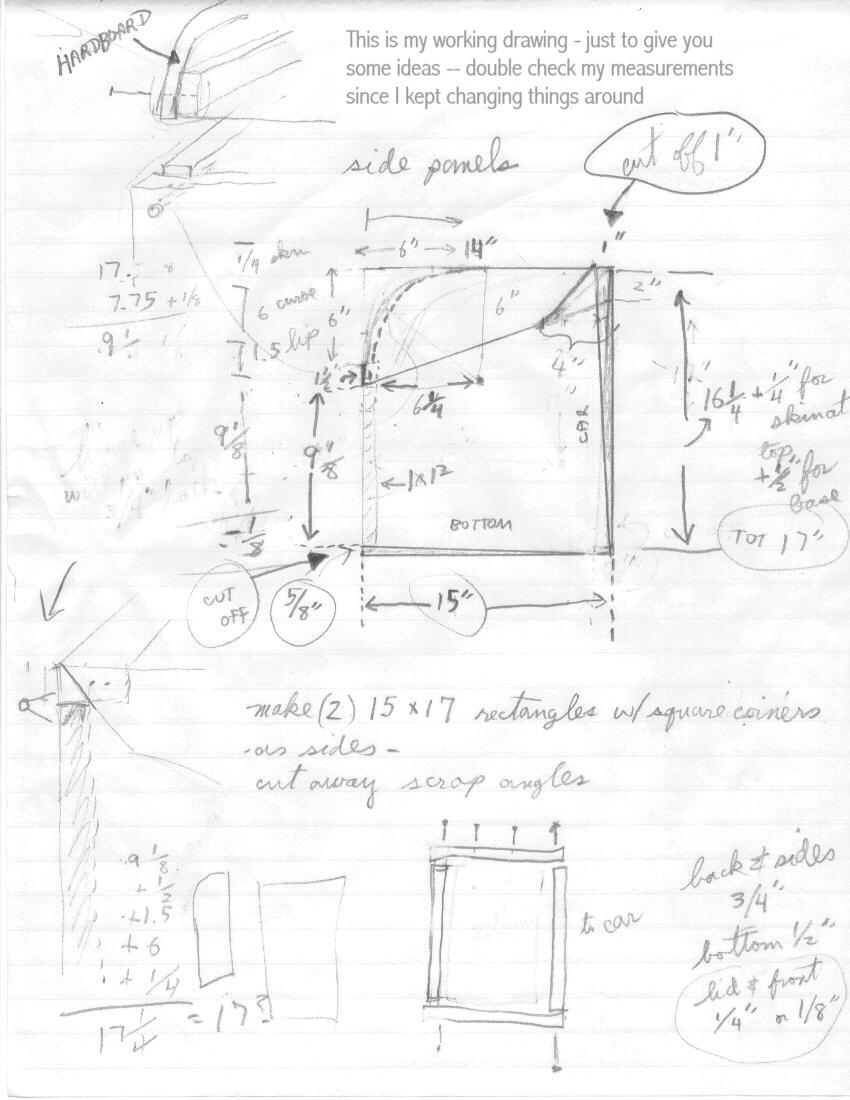
| Note on cutting the top from the bottom parts of the side panel - in the drawing above, the first straight line across the rectangle starts 2" down from the right top corner and 7 1/2" down on the left. That is 6" for the curvy part and 1 1/2" more so the 1 x 2 brace will be straight up and down. Of course, these measurements are purely one of about a million choices you have. | |
| I got a quote of $15 per yard for Vinyl
top fabric, and whether it is 48 or 54 inches wide, I
calculate that 3 yards will do the job. Fortunately I
took my lid to the convertible top place when I picked up
the fabric, and he sewed the top piece, and glued down
some 1/4 inch foam and fitted the top over the lid. All
for an extra $10. I was advised to staple gun the fabric on rather than glue it, and to put the whole thing out in the sun for a bit before stapling it in place. I was told not to staple too close to the edge (the part that may be seen) since, if I need to un-do and re-staple, you don't want the old holes being out where they can be seen. |
|
 |
In this picture, you are looking down into the trunk bottom. at the hardware needed to complete the project. Note how I notched the front where the lockset will go. This hold-open bracket (on the right) was not the right type. Those corner brackets were too small to be very effective looking. |
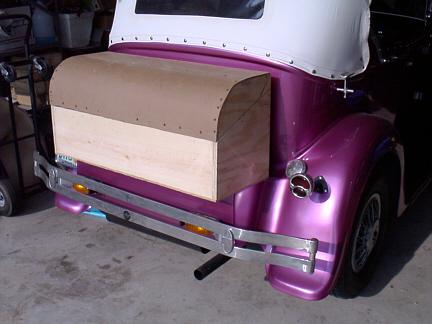 |
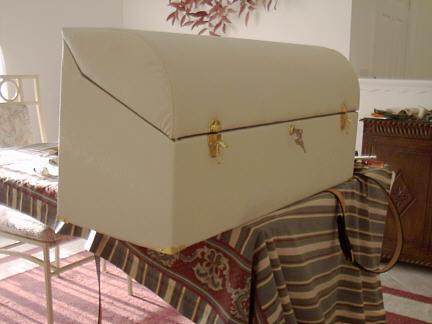
Here is the box before being covered and adorned with hardware. |
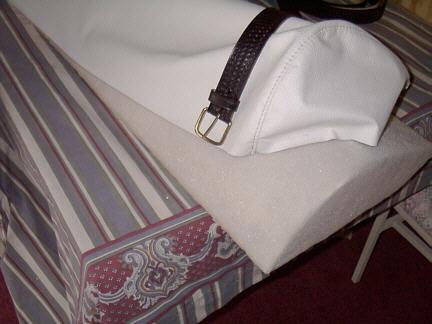 |
Here is the lid, with the foam applied by the convertible top place, the sewn seam on the top vinyl and one of four belts I got at the local flea market. I would LIKE to make the belts non-functional so that there are not too many things to unfasten to open the trunk. |
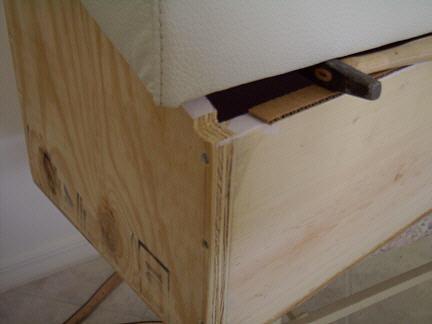 |
Once the vinyl was tacked in place on the lid, it became apparent that there was a gap along the lip of the bottom. I cut some heavy corrugated cardboard to staple-gun in place along the lip. I stopped the cardboard where you see in the pic. and notched out the corner of the side to handle the bunching of the vinyl in the corners. |
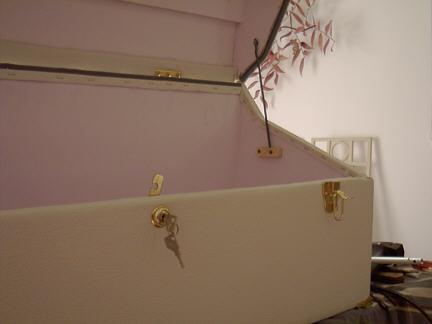 |
The hold-open bracket did not work for this kind of box. I made one from old scraps. The rod (from a hanging file frame) has a hole at the top with a screw through it to swing freely. The block of wood bolted to the side has one hole all the way thru up and down and one hole part-way through as a cup for the end of the rod.. |
 I added 6 rubber feet to the bottom so rain will run underneath the box when it is on the car. |
To close the lid, you lift up and guide the rod down through the hole that goes all the way through.. Note the notch I cut in the lock set bar, so it will hook on a screw on the inside of the lid. Putting on the vinyl is a 2-person job! the bottom is one piece wrapped all the way around with the seam where one of the belts will go in the back. Clasps in 5 inches from the end, belts to go 9 inches from the end. |
 |
Aside from me casting a shadow on my subject, this is my solution to the strap problem. the belt looks complete when the end of t he belt covers the screws, and there are 2 less things to un-do to get into the trunk. These belts are stiff enough that the tail of the belt will not flop inside when closing the trunk. |
| IN CONCLUSION -- This cost more than I expected and was a lot of work. If you can BUY a trunk, that is a quick solution. I have not reported on bolting the box to the car, since I assume that it will be routine. 4 bolts, wide flat washers in the box and under the fiberglass and nylon locking nuts on the bottom. Of course, you will check carefully WHERE you put the holes in the rear pad. Drilling into the gas tank is not recommended! | |