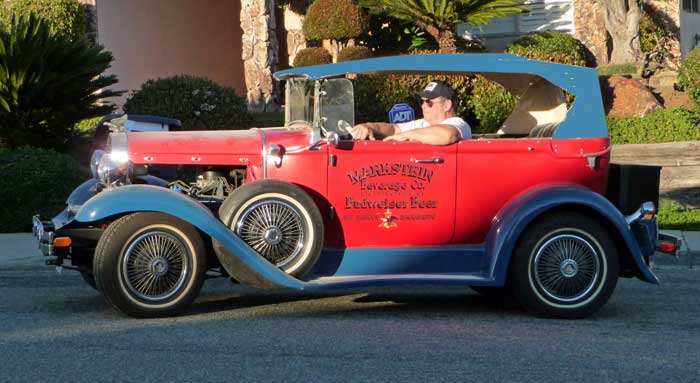
| This page includes several items and projects in 2010 jump directly to TOP FRAME reference pictures- Car 689 was topless when I bought it, and I happened to ask if there was a top anywhere, or a top frame. It turned out that both had been stored by one of the owner-partners that had bought the car, but they had not used either part (sunny California). When I tried the parts, the frame seemed fine, but the top fabric was very used, and also the back section, with the window, seemed to be 5 inches too short. It looked like it was for a chopped top car. It was not even close to fitting that frame. I still don't know what that was all about. jump directly to FIBERGLASS TOP (below)- I decided I wanted to try to build a fiberglass top from one or more truck toppers, or as they call them in California, camper top. Others have made different tops and I had built a hard-top for car 1254, and it worked great, but I did not like the shape, or lines of the top. My goal is to make THIS one look more like the shape of the cloth Phaeton tops. I will post more pics as I work on it. jump directly to TILTING TRUNK - (below) I had built a trunk for car 1254, my previous Glassic, and was very happy with the results. With this car, I was more interested in getting ANY kind of a trunk on the car to store my "stuff". I saw a trailer tongue storage box at a yard sale ($40) and decided that its size was good. The early '70s Glassics have this major issue of having the gas tank filler right where the trunk belongs. Here was my solution. |
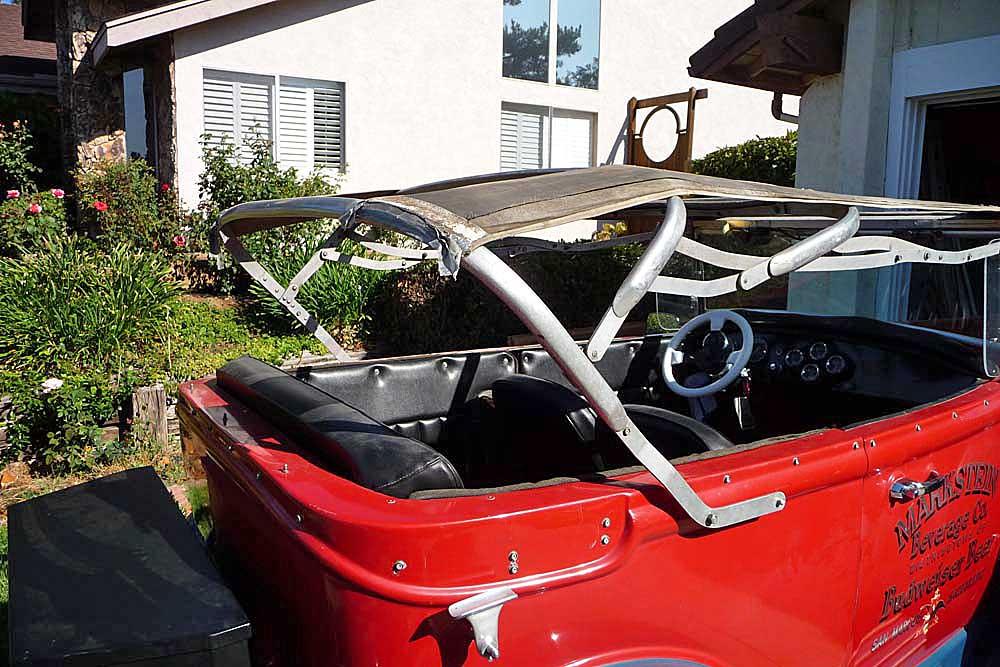
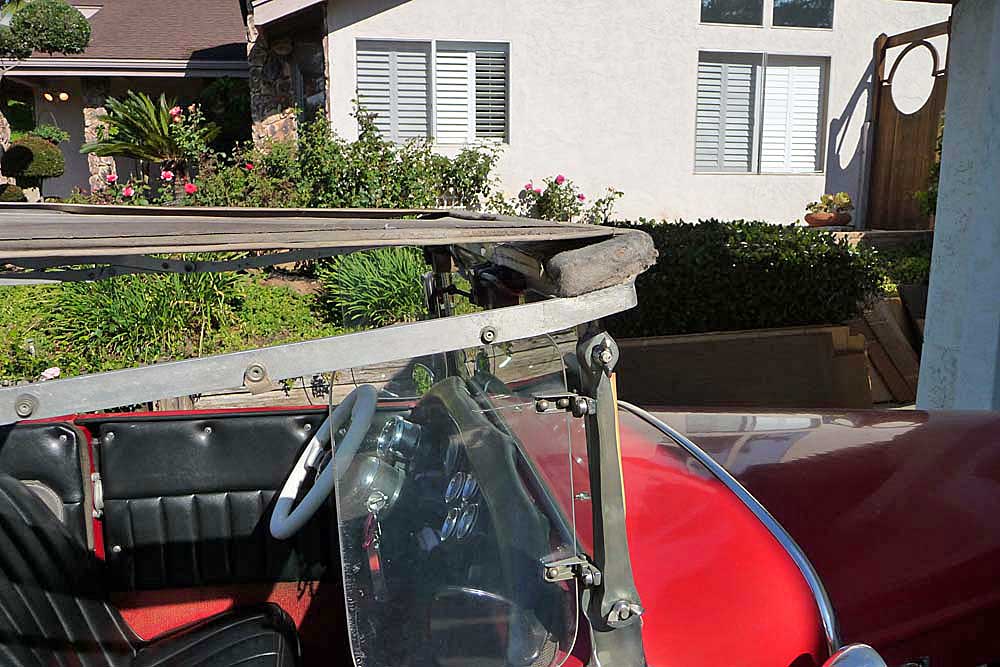
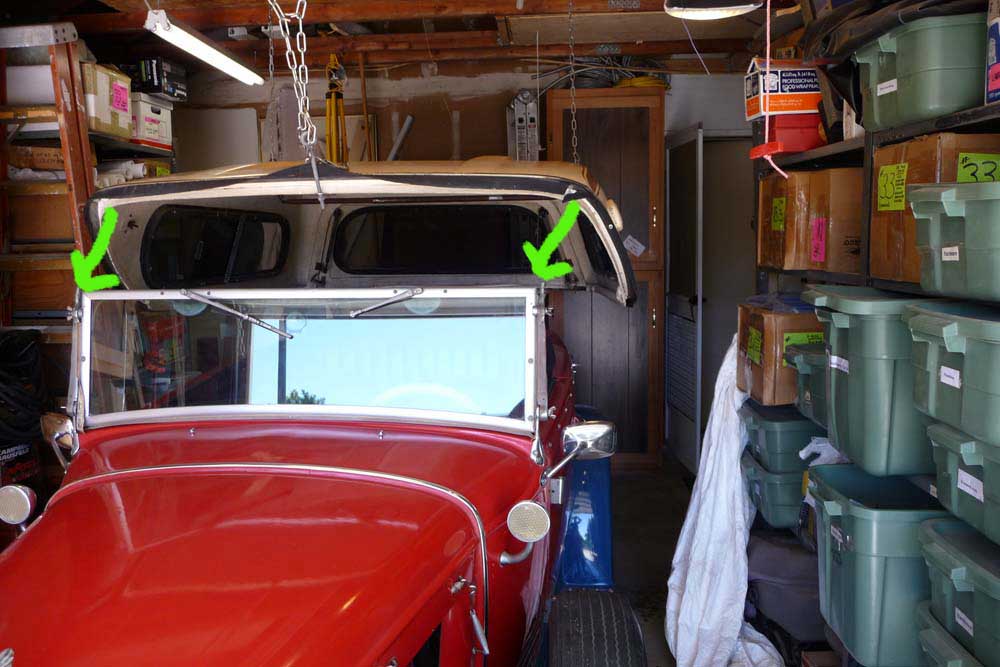
TOP FRAME -- some photos for reference purposes.
|
FIBERGLASS TOP - The section below documents my attempt to make a fiberglass top starting with two truck camper caps, or toppers. So see my previous attempt (with windows for an air conditioned Replicar) go to the top of this page for the link.
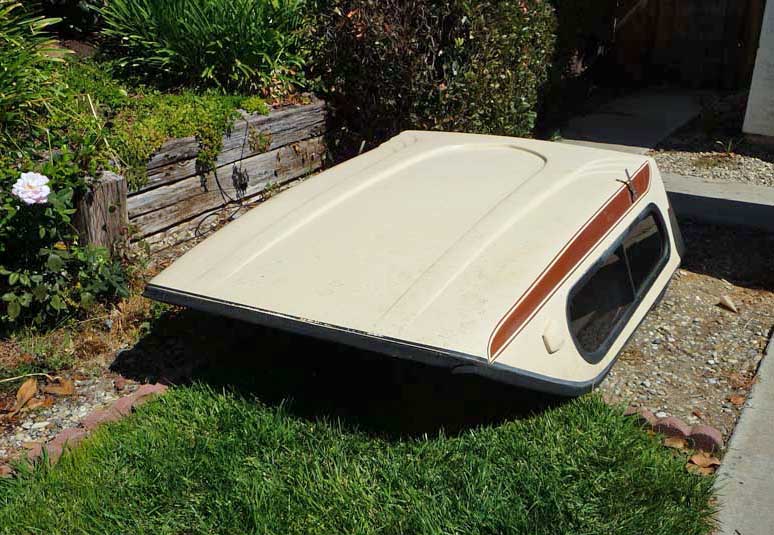
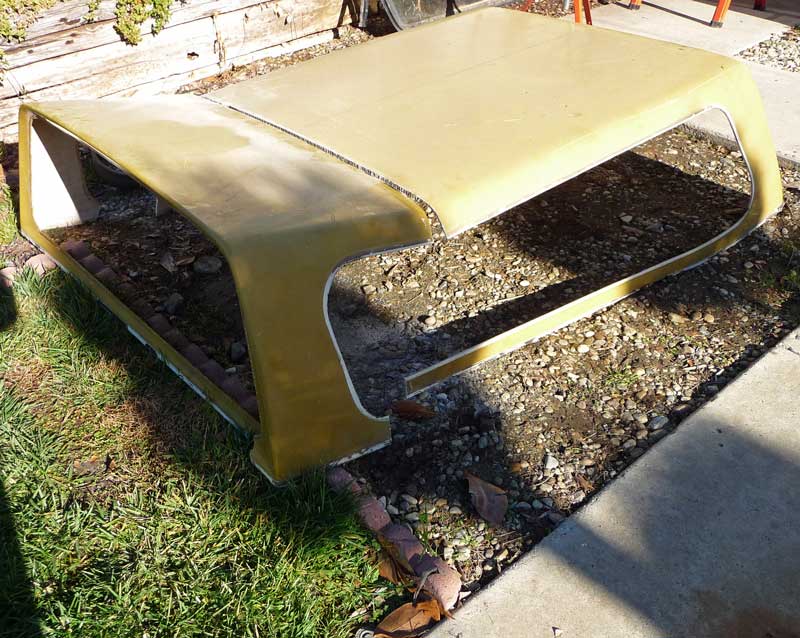
Above is the more-or-less finished product. -- at the bottom of this "article" are more pics of the end product. After taking careful measurements, I threw all that info out the window when I saw a Craigs list ad for a FREE camper top for an early '80's El Camino. Not only was this nice guy giving the thing away, but he would deliver it for gas money! When it arrived, he would not even take the gas money. I think we have a new Glassic fan!
I knew that El Camino toppers taper narrower toward the front, which should work fine on a Glassic. I already added scrap metal brackets to the bolts at the rear top sides, so I could hang it in the garage.
Not having a smooth top does not help in this case, but I hope to factor in those "style lines", which should also strengthen the top.
The topper happened to have some bolts on the outside rear (for an internal coat rack bar) so I used them to make loops to hang up the topper from the garage rafters. Using chains pieces I can adjust the height up and down to work on the project, and eventually, use them to store the top when it is off. Note that the topper is wide for our needs, but it also tapes from side to side, so the top part is narrower which should work fine.
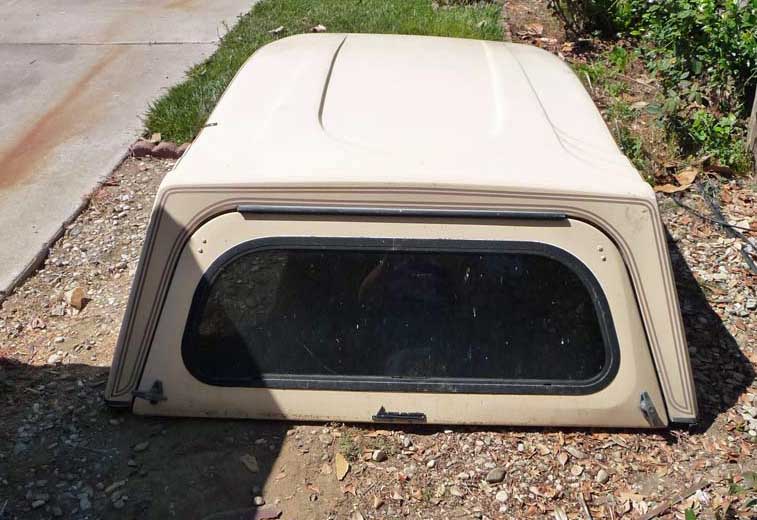
This view toward the front is a bit misleading. The topper IS too wide, but when lowered, it is nearly a perfect fit at the front. I will build a front bar with two aluminum cubes to hook on to the pokey pieces on the windshield stanchions. The aluminum came from some pieces I had found at an aluminum scrap yard, and the bar will be a piece of wood left over from my kitchen remodel. The bar will be attached to the topper on the under-side across where the back ends of the two green arrows are. Job one was to remove both windows from the topper along with the back lift up door. --- jump ahead a bit and progress continues on this top. Here are some pictures after I found a Toyota (older vintage) topper or, camper shell, as they call them in California. This one was beat up, but only $25 and I had a choice of two - so I picked the one that was plain, and had no grooves or designs.
above is the Toyota cap hacked apart and the front part, where it would rest against the truck cab is layed down on its back on te rear of the car. -- as you can see, it is too wide, and the angle of tilt is wrong, so I ended up cutting it up and will re-form it.
This back piece was too long, and I knew that, so in the picture below, I had cut down the rear to form an angle going down toward the rear.
Here we see how I cut down the piece above an also cut down the el-Camino top -- the gap in the middle is to be filled in with a strip of the top of the Toyota cap. The piece laying on the sill of the car is a strip for piecing together -- a sample of the profile. The top is going to be pretty high, but the first one I build, I would hit my head on the roof every bump in the road -- no chopped look this time - going for comfort. Also, you can easily see, the profile of the gold part and the el Camino do not match. That will be a challenge. Also, the curved "wings" or parst that go around the back sides will be saved for last. I see this thing being structurally sound (sort of) without them, so I figured I could align those parts at the end.
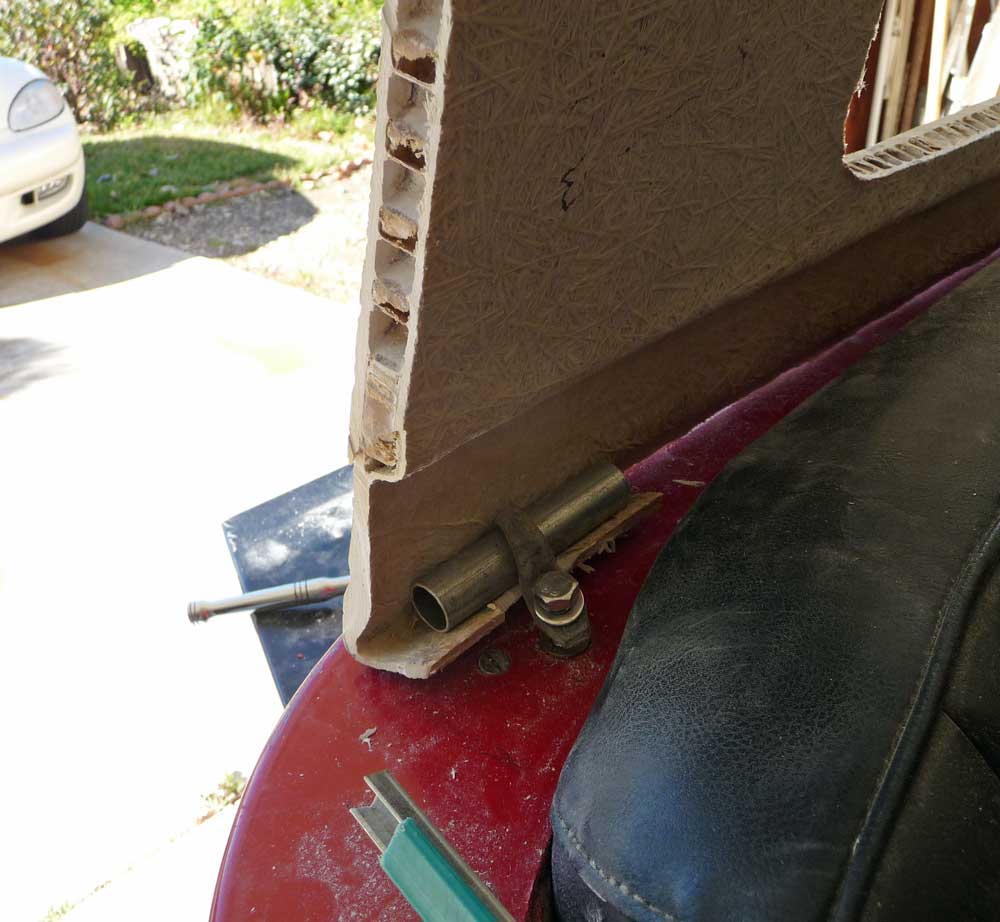
The angle was not right for the front blocks to rest on the top, so I
built up some triangular pads for the blocs to be hooked to. The
pads are wood,
The angle of the back was not good, so I made my rear holders from a piece of pipe scrap and a pipe bracket. There will be a rubber base on the top when I get done. The other car used a garage door base cut down and it worked fine, but I want something this time that is L shaped to cover the rear seam as well.
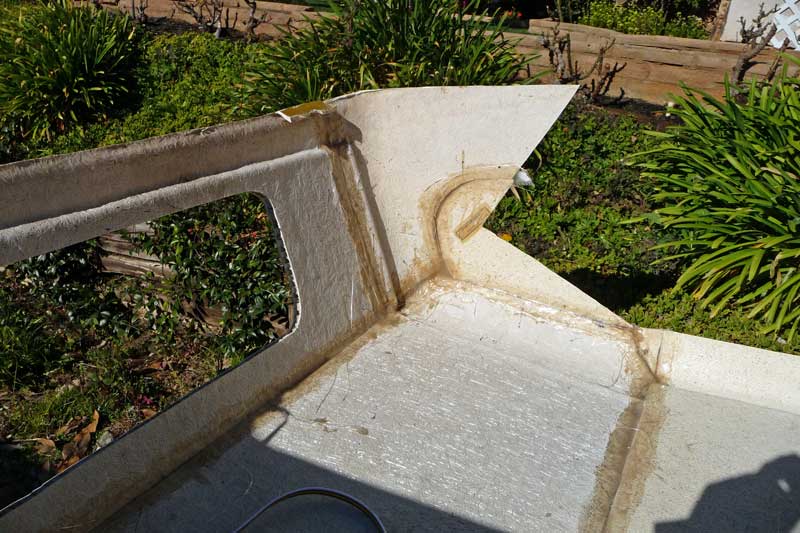
above you can see that the elCamino top and the truck are NOT a perfect match - by a long shot. The back two pieces have been hooked together with steel rods that I bent to match the angle, and several L shaped scraps of fiberglass hidden inside the double layers - then fiberglass cloth and resin. Note that resin does not stick well to paint, so that smear will sand off easily. I got a 36 inch of flat steel at Home Depot ($10) and bent it to use as main spines between sections one and two. I also will insert sticks of scrap material inside the center section ot strenghen that part also. Both of these tops were made of a sandwich of fiberglass, like corrugated boxes, so hiding the strengtheners will be easy. Once all 3 pieces are together (and still can fit the car right) then I will start blending and merging using the considerable scraps that are left from the two camper tops. I plan to use a laser light thing to make a diagonal line for where to cut the wing pieces.
A few days later and the car is ready for its first road test to see if it all falls apart. The back wings (curved parts around the sides still show the cutout where the window was on the original shell -- the photo-shopped version below shows the plan to fill in and merge. Blue is not necessarily the color of choice. The top ended up higher than I would have liked, but its ok so as not to bang my head, and the windshield ended up more upright than I would have liked when all the pieces were hooked together.
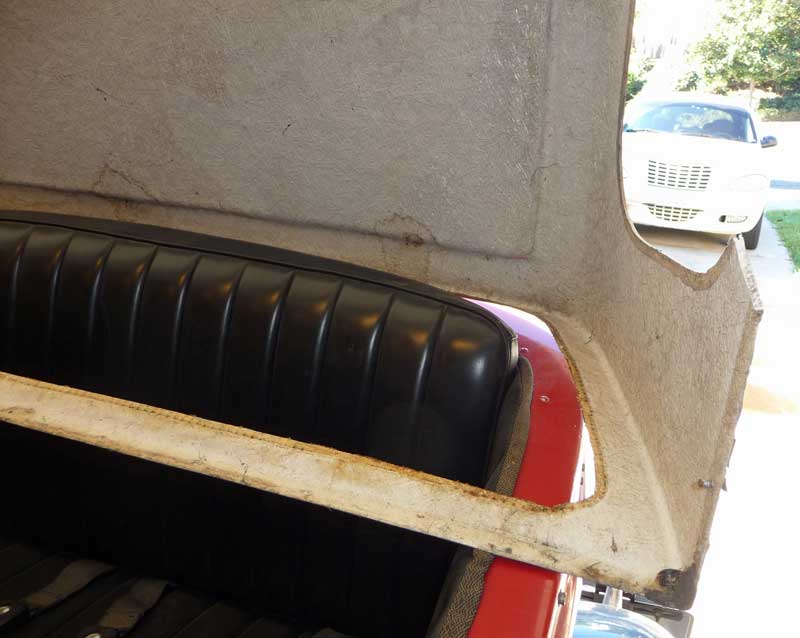
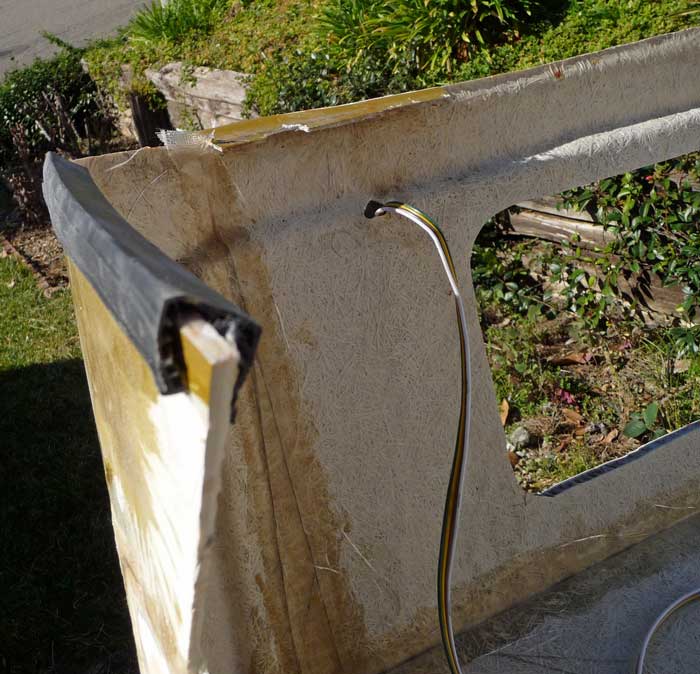
the photoshopped "concept" on the left and actual on the right above. Now comes further blending of mis-matched parts, smoothing, strengthening and filling in. A trip to a glass store got me some free channel rubber to put around the back window opening to conceal the corrugated interior. Some leftover bronze plexiglass from my last top will be the back window.
After cutting scraps to fit the hole left on the "wing pieces" I glassed them on the outside and then flipped the whole top over and placed fiberglass strips on the insides of all seams. -- removing and flipping the top did not break any seams, even without taping the insides of all seams. It should hold!
I plan to lightly sand and prime the seam areas, then paint the whole inside a light, neutral color like the original inside colors.
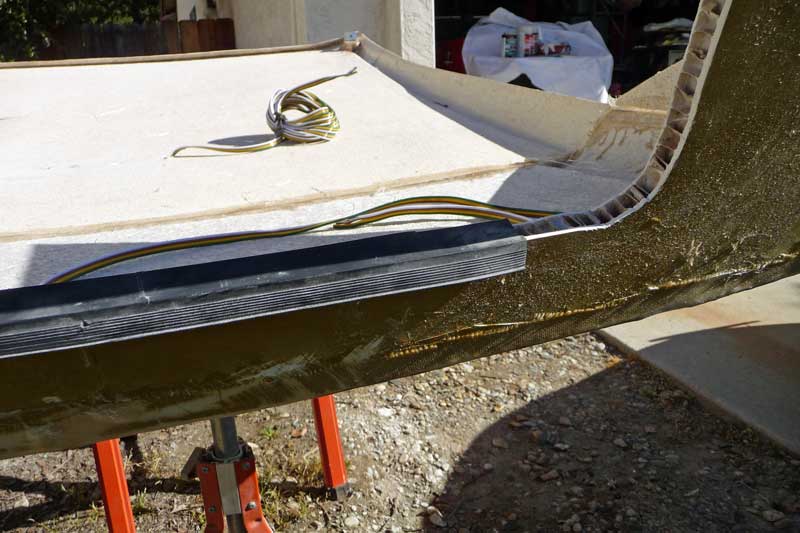
I got some used rubber channel from a local glass place (free) -- the channel is for half or 5/8 inch glass so it hides the seam on the rear window (right picture) and, with the back ear cut off, will mask the outside edge and provide a cushion for the top on the rear deck of the car. Wires -- before assembly, I fished a 4-wire trailer strand (3 items and a ground) to the center of the inside and back to the rear deck area. This is for future dome light and maybe some neons, etc. The right picture shows the coil of extra wire that I will cut off and use in the rear deck to continue the wire to the dash area.
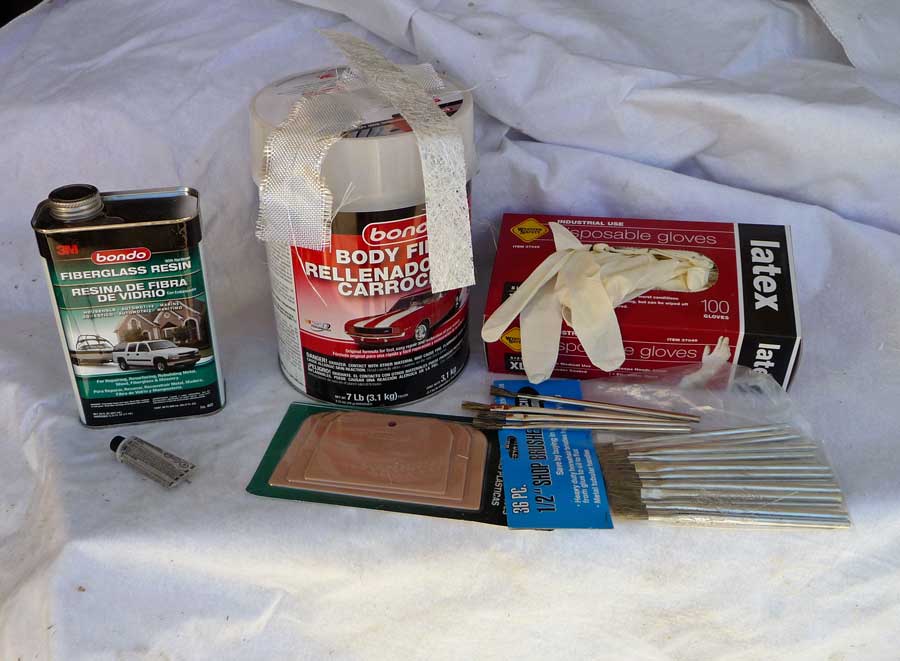
The next steps involve lots of Bondo to blend the joints. I found a way to lower the cost of the top: Don't write down all of the expenditures! The resin, left and hardener below -- I am on my second can. Cost between $10 and $15 per can -- one car store was cheapest, another highest in cost and Lowes came out in the middle. Bondo - I got a gallon size to be on the safe side. $20 or so. Some spreaders for the Bondo - they are semi-soft. On top of the Bondo can are scraps of two sheets of fiberglass cloth, one whit a random pattern, and one with a woven pattern. I used the random mesh for initial coats, and the woven for strips on the inside and top layers on the outside. Rubber gloves -- a must-do $6 or so for 100 at Harbor Freight -- that resin is way sticky and you do end up touching things to smooth them out. And little brushes to apply the resin -- 36 of them for 3 or 4 dollars. They last one or two batches of resin and then harden like a rock.
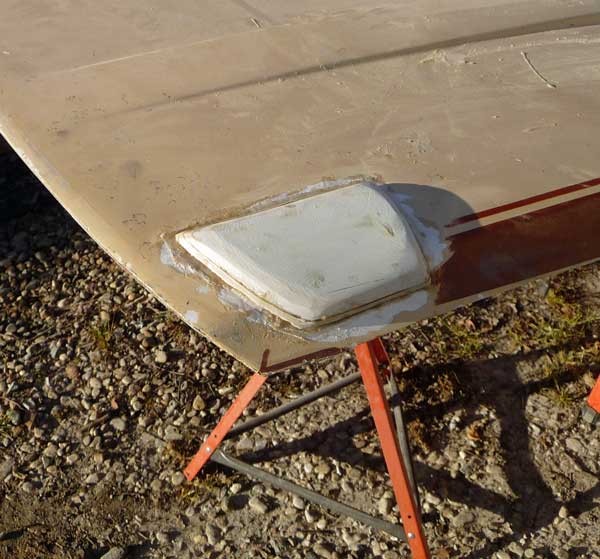
above - I built pads to cover the bolts for the windshield mounts - an unfortunate necessity, but will look better when bondo-ed in.
Lots of bondo and the lines are coming together - I will need to use a
larger spatula to keep the lines from being as wavy as they are. I remembered a guy with a VW who used truck bed liner to paint his entire car. That bumpy stuff will look like a cloth top - sort of, add texture, and will hide little flaws in the finish. That stuff comes in many colors and, as the guy said, applies easily. TRUCK LINER PAINT -- This may be a good idea, but I had trouble finding it locally. Herculiner makes this product in a kit for about $150, but I only found black in one car place - when asking about white, I was told that Herculiner was "recalled" by the Pep Boys parts person as having some toxic chemical that California did not like. Mail order was going to be my only choice. One place, (not Herculiner brand) bragged about their service and support on their webpage. When my email inquiry went un-answered in a week, I decided not to order from them. Herculiner DID reply in two days to say that it would be about 10 days to get the product to me in California. Since they have white, gray, and red, that still is an option. NEW IDEA -- while browsing Lowes, I found white elastrometric roof paint (rubber-ish) ad $26 a gallon. Then, in the paint department, I found a box of texture "stone" roll on -- a powder, gravel thing that one adds to a gallon of paint. ($5) While likely not as "bumpy" as the truck bed liner, it should do ok in the weather, and sure is cheaper and easier to find. The roof paint says that you can tint it, which increases the options also. Report and pictures to come soon.
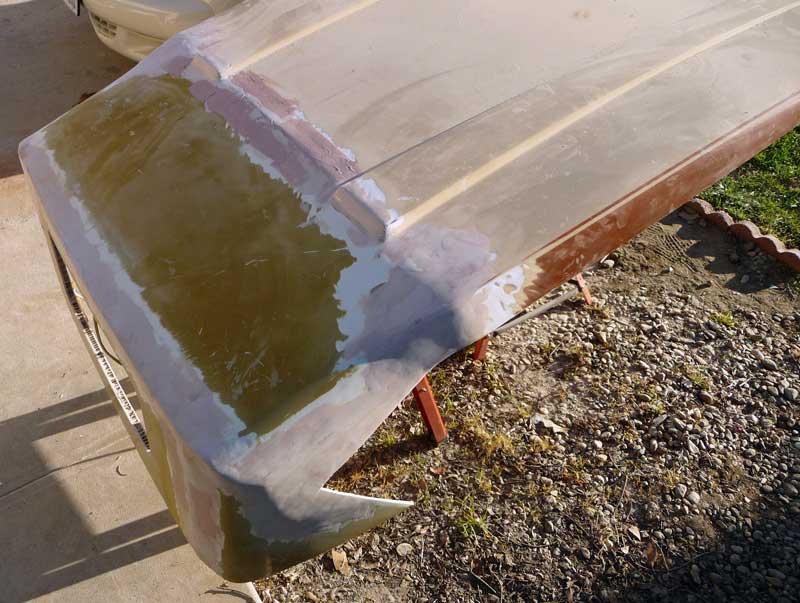
The blending of two totally different shape tops is coming out better than I thought it would.
Lots of sanding still needed, and I have to add a piece (a scrap leftover) on the inside to match the curved top to the flat windshield
Once this is painted, it should be quite adequate for the job -- if you squint, the lines are not bad.
Finished product - plexiglass rear window added.
- I don't have close-ups, but the roof paint looks fine. I did NOT need to use the coarse texture - the fine would have been sufficient, or possibly even no texture. It did need two coats to cover all, and there was plenty left over for painting the interior if I ever get around to it. |
TRUNK - tilts and slides to the left so you can get at the gas filler.
This trunk seems a decent size, and it is filthy right now. I had bought a Budweiser decal to go with the theme of the car, but made such a mess trying to stick it on the back of the trunk, that I gave up. I removed the luggage rack itself and used the hinge rod and brackets only.
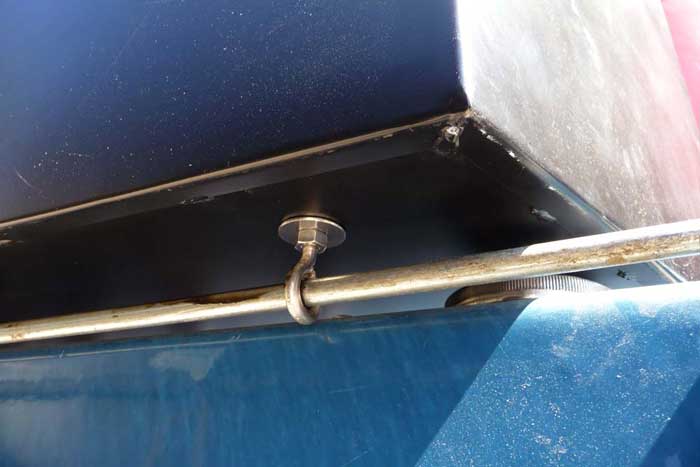
This shows much of the concept. #1 is one of two eyebolts looped around the rod that served as a hinge for the original luggage rack. I got stainless steel ones and had to cut out a piece of the loop and beat the loop smaller so it would be snug around the rod. The hardware store did not have the exact size, and leaving the eye too large made the whole thing wobbly. #2 are rubber spacers to keep the front side of the trunk up off the gas cap. It is a spacer that could be made from anything. I used a scrap of rubber and an old shock absorber bushing. I have similar spacers on the driver's side, but the trunk just sits on them - no bolt. This whole setup is not the sturdiest - there likely should also be a bolt on the drivers side also, but then you have TWO bolts to remove to get gas, and the driver's bolt will be in the way some when you slide the trunk over and then set it back down while gassing up. # 3 shows the gas cap underneath with just a little clearance. The height of # 1 was adjusted by having a bolt and washer both below and inside the trunk.
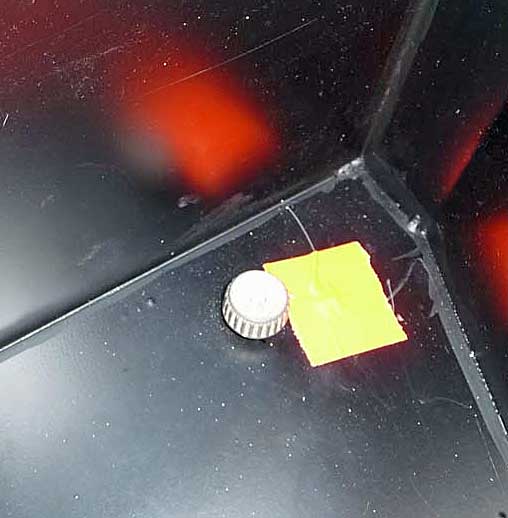
This view is inside the trunk and shows a knob that I had in my scrap drawer. The yellow tape hides a hole that was in the trunk for installing it on the Y part of a trailer hitch tongue. A wing nut would work ok too here.
This shows one of the two eye hooks. Notice that they are several inches from the corners, since you need room to slide everything to the left a few inches to clear the gas cap.
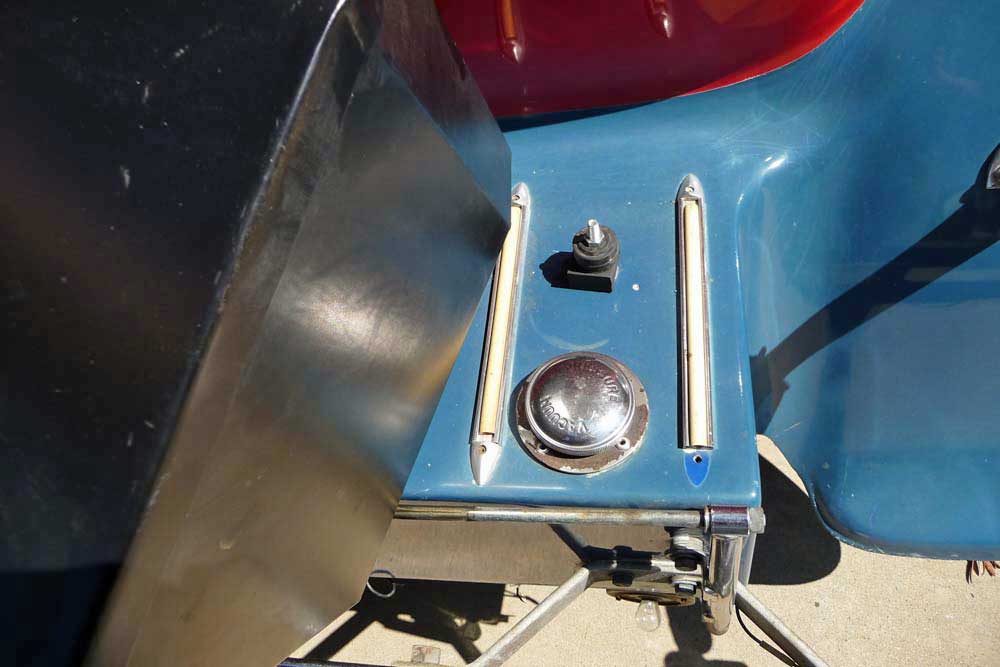
Here is where this otherwise so-so project works. You open the trunk, undo the knob or wingnut, tilt the whole thing back up off that bolt and slide it to the left to reveal the gas cap.
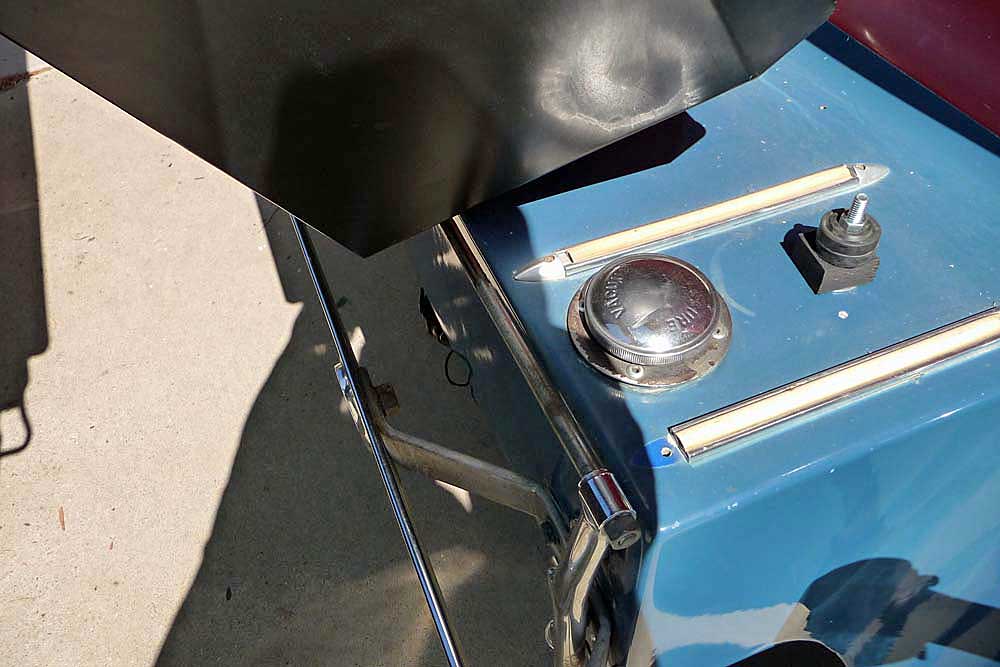
Another view of the trunk tilted out of the way. You can set it back down while gassing up, then tilt it back scoot it over, peek through the hole in the trunk to line up the bolt, and set it back down. CAUTION - be careful drilling through the platform you will want to avoid making an un-wanted vent in your gas tank, and you need to be sure that you clear the frame underneath. The white dot below the bolt is a false start, where the frame underneath would not have let a bolt go through the deck from below. |
|
|


 -
-